Showing posts with label Crafts. Show all posts

Tuesday, March 1, 2011

Button Earrings

Sorry I've been M.I.A. lately.  I had a baby with double ear infections and a screaming hot fever that wouldn't go away.   Once she was better, we went off to play for the week up north to see my family.  Don't worry though.  Whenever the girls in the family get together you know there is some crafting going on so I'll show you what we were up to.

Jo-Ann's had all there buttons buy one get one free plus 10% off your purchase so I snatched some up to make some button earrings for super cheap.  I saw the idea at Trey and Lucy.  This has to be the easiest "craft" ever!  I think it took less than 2 minutes to do the whole thing so I don't know how much that counts as being "crafty".

I just took my wire/metal cutters  (I don't even know what the tool is called but at least I know how to use it!) and snapped off the back of the buttons and glued the button with some E6000 to earring posts.  You can also use hot glue I was just being impatient and didn't want to bother waiting for the glue to heat up.

And there you go!  Here is my "modeling" pose for you and in case you are wondering, yes my skin is that white all year round! ;0)  I also bought some huge buttons to make some rings but haven't put them together yet.  I'll have to show you some time.

I'll be linking to some of these places check them out for more fun ideas.

Tuesday, January 4, 2011

McKinley's Rockin Rocking Chair & Other Cute Stuff

 My parents gave this to McKinley for Christmas.  I love it!  My mom got a plain wood rocking chair at Michael's for 60% off and painted it white to match the rest of her nursery and made that adorable flower petal cushion to go along with her garden room.
 I love it.  McKinley also got this cute pillow made by my Grandma...
 It says,"Like star dust glistening on fairies wings little girls are made of magical things".  The back has this fun, shimmery fabric.  The pillow fits perfectly on her chair.
Another fun touch my mom added to the chair is one of those tiny musical button things (I don't know what they're called), you know the kind that is put in stuffed animals.  She glued it under the arm rest so Kin has herself a secret music button.  She hasn't quite figured it out yet because the button is so small and kind of hidden but whenever she hears the music she does a little dance too it.
 Here she is modeling the Christmas pajamas I made her while she reads some sort of fascinating story.  I think she loves the new seat.  I wish you all could hear her jabber like crazy while she's "reading".  If only I knew what she was saying.

Matt's mom made Kin an adorable, squishable, bunny blanket.
 McKinley loves to hug it.  She thinks it's a baby and packs it around.
 Thanks for all the adorable gifts!  I'll be back tomorrow to show you some other good stuff!

Monday, January 3, 2011

I'm Back...and My Favorite Projects of 2010

I'm back!  I love when blogs do a favorite's post at the end of the year because I don't see every post that everyone does and I get to find a lot of fun projects that I didn't see before so I thought I'd share some of my favorites. 
 
 I love how McKinley's nursery turned out, it was technically done in 2009 but oh well!  I'm afraid I can't claim most of the work.  My little stinker, McKinley, was born super early so I didn't have a chance to do much before she surprised us with her unexpected early appearance, luckily my mom and sister came to the rescue (because you know I couldn't possibly live without having a cute nursery!) ;0)

I loved this ruffly skirt made from an old t-shirt...too bad kids grow so fast, this has been too small for a long time!
 
 These necklaces were quick, easy and cheap.  Just my kind of crafting!
What little girl doesn't love a doll to squeeze?
You can't have too many accessories...right?
I love my dollar store painted frame holding a flower from my wedding bouquet.
I loved learning how to shir on this little dress.  It made me shirrr crazy!
Easy and cute hair accessory organizer.
I had to throw in a recipe here.  This is a good one. I don't think I ever cared what my syrup tasted like until I had Buttermilk Syrup...yummy!  Believe me.  You are going to be sorely disappointed with your bottled stuff from this point forward.
 
Sweet little, I scream for Ice cream onesie and matching hair clips.
This project was one of the most fun.  I loved planning McKinley's first birthday party.  So fun!

Thank you to everyone who visits my crazy little blog!  My camera is fixed and I should be back in business again.  I ran out of time and only got around to making one handmade gift this year and didn't even get a picture of it since I didn't have a camera.  My family however, made some incredibly cute things that I'll have to share with you tomorrow.  I also have all the pictures I needed to show you of my mom's kitchen redo so you should see that soon.  I have a crafty to-do list a mile long and a garage full of junky furniture to redo so hopefully you'll stick around for the ride and maybe I'll actually get some stuff done!

Thursday, December 9, 2010

Christmas Braided Rosette Tutorial

 I actually made this a few months ago but I decided it screamed Christmas to me and so I saved it for now.  So in case you were wondering...no, I didn't make McKinley sit outside in capris and a t-shirt in the middle of December! ;0)

Supplies:
-knit fabric
-felt scraps
-3/8" ribbon
-alligator clip
-pearls or other embellishments (optional)
-hot glue gun

 1-Take 3 strips of knit fabric about 1/2" wide and however long you'd like the longer it is the bigger the rosette (I guess that's obvious).  For my fabric I used an XXXL shirt I got at Walmart on clearance for $1.00....score!  It's a great way to get fabric for cheap!
2-Stretch the fabric so the ends curl up.  Tie it in a knot at the end.
3-Braid it together and tie a knot on the end.
4-Cut off the unbraided ends close to the knot.  Take a small square of felt put a large dot of hot glue.  Quickly, coil up the braid and stick it right onto the hot glue.
 5-Keep winding the fabric around, gluing as you go.
6-When you near the end of your braid, trim the felt to right up against the rosette.
7-Hot glue the last bit of braid.
8-Glue the end to the back of your rosette.
 9-This pictures just shows that I obviously just took to many unessecary pictures for such a simple project!
10-If you want a "leaf" glue together the ends of a small piece of ribbon.
11-Glue to the back of your rosette.  Glue a small circle of felt on top of that to cover up your mess.
12-Attach to to a covered alligator clip (see my other tutorial HERE for tips) and you can be done if you'd like or...
 add some pearls!
Now all you need to do is attach it to a cute little lady!

If you want one but don't want to make one yourself, you can purchase one in my shop, just look to your right. I will be linking to a few of these places.  Check them out for more fun ideas.

Friday, December 3, 2010

Wordle Subway Art


Have you discovered Wordle? It's a website where you can make subway art for free and you don't have to be all tech savvy or anything to use it?  I made this one in a couple minutes.  I'm not actually going to use this one for anything, but I just wanted to try it out.  

This website would be perfect if you're into Subway art for seasonal decorating.  Wouldn't it be fun to make a Christmas themed one and put it in a frame? 

Make sure you check out the FAQ section before you do it.  It explains how to make one word larger than the other and how to save it.  It's super simple....SWEET!

Friday, October 22, 2010

Felt Flower Clips Tutorial

This is the tutorial I posted for the blog swap the other day but I also wanted to have it here.  So in case you missed it, here it is...

Need to add some sass to your little lady's hair?  A couple of these should do the trick...


Gather your supplies:
-2 small felt squares, one slightly bigger than the other (mine measured 2" squared and 1 3/4" squared)
-one piece of, 3/8" wide ribbon cut to 3 1/2'' long (grosgrain ribbon works well)
-some sort of "bling" for the middle of your flower (I used a rhinestone)
-double prong alligator clip (you can get these for pretty cheap at beauty supply stores, I found mine at Sally's I got 100 clips for about $5.00)
-candle
-lighter
-scissors
-hot glue gun
-hot glue
-non slip shelf liner, optional (I got mine at the dollar store)


1-Heat seal your ribbon (to prevent fraying) by running the ends through the flame of your candle.
2-Sandwich your ribbon between the prongs of your clip, right side facing down.
3-Run a string of hot glue on top of the prong where the ribbon is.
4-Quickly fold the ribbon up and over the top prong.  Pinch the ribbon together to smooth out the glue.  Be careful, the glue is hot!  Remove any excess glue.
5-Continue gluing on ribbon and smoothing it out as you go.  Do just a little bit at a time until you reach the end of your ribbon.


6-Round the corners of your felt, forming two circles.  It doesn't need to be perfect.
7-Cut a slit in the middle as shown in picture.
8-Cut a slit on the opossite side of your last one.  Do the same to the other side.  You will end up with 4 slits.
9-Round all the corners.  This forms your petals.
10-Glue it all together.  Make sure your smaller flower is on top.
11-Glue your flower onto the center of your clip and now you're done!....unless you want to add some "no slip grip" if you're making this for a little lady with fine hair.


12- cut a rectangle of your shelf liner slightly smaller than the base of your clip.
13-Glue on the shelf liner to the back of the top of your clip.
14-Now you are done!  It can now grip onto the finest of baby hair, even a single piece of thread.
15-Repeat steps 1-14 and attach to some cute pigtails.  I love those little whale spouts!


I also made a pair of these to match the "I Scream" onesie I made.


I will be linking to some of these parties.  Check them out for more crafty ideas!

Tuesday, October 12, 2010

Hair Accessory Frame

 I needed something to hold all the flowers I made for my craft booth, so I went to the thrift store and found these frames for $1.00 each.  I popped out the odd velvet, cat fur filled pictures (yuck!).  I spray painted the frame with some leftover spray paint (Rustoleum Heirloom White) and then cut two pieces of cardboard the same size as the old picture and covered one with some plain pink scrap fabric that I already had.  I pulled the fabric so it was really tight across the cardboard and attached it with some hot glue.  Than I added the leaf ribbon that I have had for a long time and didn't know what to do with.  I stretched the ribbon tight across the frame and attached that with more hot glue, lots of hot glue.  This is what the back looks like of a third one I made with a frame I already had. 
 Next I popped on the other piece of cardboard to cover up the mess I made and here is what I ended up with...
Tada!
a cute, hair accessory frame.  I love that it only cost me a dollar and some leftover supplies I already had! 
Linking to:


Apple Festival Craft Booth

I'm back!  I am done with the craft booth I did with my friend this past weekend. I did alright I think.  I definitely don't think these type of things are huge money makers (especially when it's held in a tiny town) but I did make enough to buy a serger (a cheap one) or maybe redecorate my living room I can't decide which I want more!  I won't be holding my breath though because when it comes down to it I will probably end up doing something boring responsible like putting it towards student loans or something.  My husband is getting his MBA right now so we are still living the student life.

I tried to remember to take pictures of everything, but it didn't happen so here are the few shots I did get!
All of the adorable platters you see were made by my friend Jenna.  That incredibly cute pleated tablecloth was made by my mother a few years ago.  I got those huge antique barn windows for F-R-E-E! What can I say, one man's trash is my treasure.  The window with the wreath on it is mine, it's going up in my living room.  I had to bring it with the wreath attached so people could get an idea of what you can do with them.  It was funny listening to all the wives trying to convince their husbands that it would be cool to have an older than dirt, beat up window hung up on their wall, many of the men did not agree, kind of like the silly guy that gave us all those windows in the first place because he said they were junk and he was taking them to the dump!
  

Here is the left side of the booth.  I didn't even take a picture of the other side, sorry I got distracted and never remembered to go back to finish taking pictures.  I made all that crazy stuff including all the pants which will soon be available to purchase.  More info on them later.
  
I can't even tell you how many hours I spent on this stuff.  The night before the Festival I stayed up all night and never went to bed in hopes that I would finish everything I started.  I still didn't!  I have several half finished pairs of pants and a thousand half finished flowers and headbands, so needless to say I am going to finish everything and open an Etsy shop so all that work doesn't go to waist! ;o)

One of my favorite parts of this whole thing had to be finding and fixing up things to display all my stuff in.
 
 I already had this beat up, wooden crate.  I gave it a quick coat of some aqua colored spray paint and then put some leftover glaze I had on top to play up all the cracks it had it in it.  I didn't take an official "after" picture but you can see it in one of the pictures below.
 I found these stocking hangers at the thrift store for 50 cents each.  I am not a big fan of pure gold but I loved the design. I gave it a coat of white spray paint with help from my "assistant".


I thought they looked a little boring, so I scuffed them up to let some of the metal peek through.


I turned the crate I painted upside down and added the stocking hangers on top and it made the perfect place to hang the headbands.  You can kind of see it in the first picture.


I also found this tray at the thrift store for 50 cents.  I first spray painted it black and let it dry which I don't have a picture of, then I rubbed a candle on the edges to get wax where I wanted the black to show through.


Then I spray painted it white on top and let it dry.

After it was dry I took a rough sponge and rubbed it all over the edges.  Everywhere I had put the candle wax the white paint rubbed off, but left the black paint untouched, unlike what using just sandpaper would've done.  I used the tray to hold hair clips which once again I didn't take a picture of!  I'm sure there will be more of them to see in the near future as soon as I get all my half finished ones done.

and do you remember these little compotes (is that what they're called?) in the back of that first picture?  They made the perfect spot to hold some jewelry and now I use the one on the right to store bracelets at home.

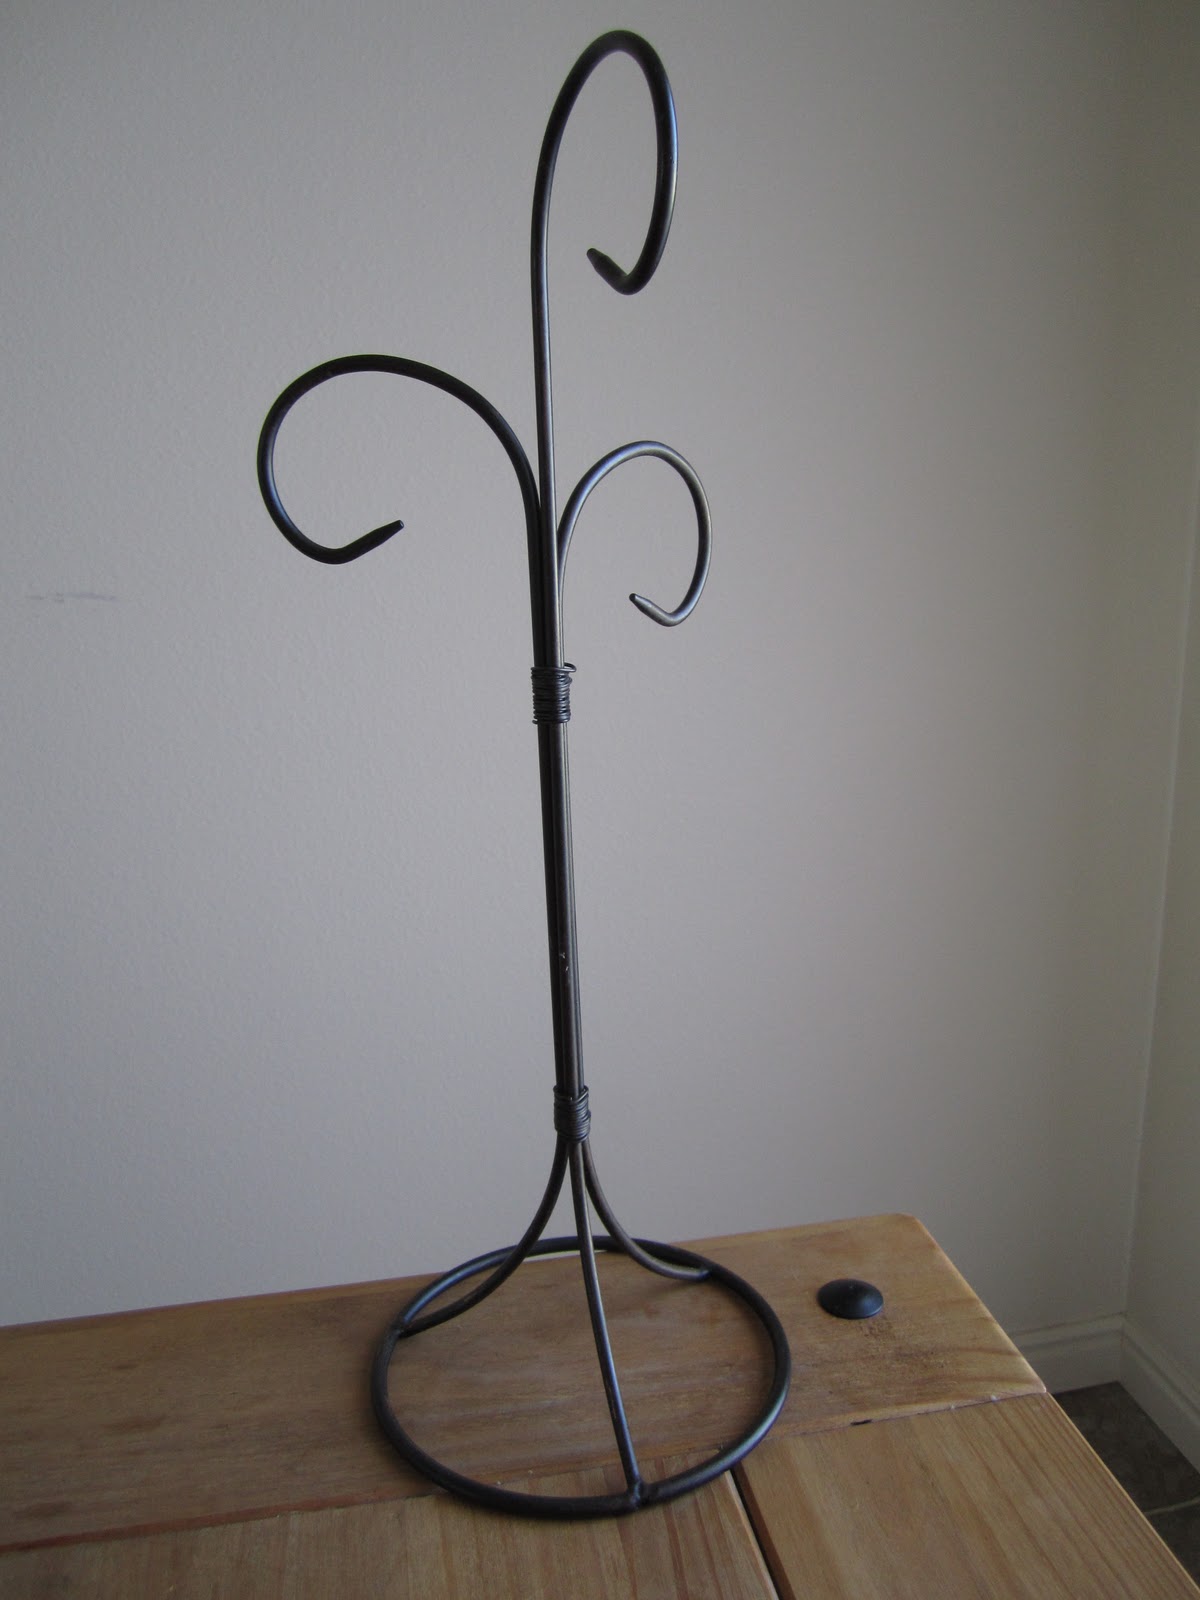
I also found this thing at the thrift store for 75 cents.  What is it anyways?  I don't have a clue.  Anyways It was perfect to hold more headbands!  I wish I had close up pictures so I could show you all the stuff I made.  I will just have to finish up all the half finished stuff I started making and then post pictures of that.
Related Posts with Thumbnails
 
Related Posts with Thumbnails