Friday, October 15, 2010

More Cards

 Here are a few more cards I've made recently.  This congratulations card I made up using a floral design I found online (sorry, I don't remember where) and some more felt flowers I made using some scraps. 
Here is a card for a new baby.  I got the design idea from Julie Cameron of Paperhearts.  She used stamps for hers but once again, I am cheap so I just found some cute free fonts online, like I did last time.  She has some incredibly cute cards on her site that you should go check out.

Thursday, October 14, 2010

Cute Apron Tutorials

Image Source


Someone asked me if I could make an apron tutorial and since I have never worn an apron (except the ugly plain ones they made me wear in all the cooking classes I took in college) let alone sewn one, I thought I would point out some incredibly cute apron tutorials I found online instead.  Seeing all these adorable versions makes me think I "need" one. You might notice I like the over the top girlie versions.  This cute ruffly one is made by  Morgan Moore you can find the tutorial here.

Image Source


I love this version by Sew4Home.  You can find the tutorial here.

Image Source
and last but not least is this cute reversible scalloped apron made by Warehouse Fabrics.  You can find the tutorial here.  Any of these would make such a fun gift for someone who loves to cook. 

Tuesday, October 12, 2010

Hair Accessory Frame

 I needed something to hold all the flowers I made for my craft booth, so I went to the thrift store and found these frames for $1.00 each.  I popped out the odd velvet, cat fur filled pictures (yuck!).  I spray painted the frame with some leftover spray paint (Rustoleum Heirloom White) and then cut two pieces of cardboard the same size as the old picture and covered one with some plain pink scrap fabric that I already had.  I pulled the fabric so it was really tight across the cardboard and attached it with some hot glue.  Than I added the leaf ribbon that I have had for a long time and didn't know what to do with.  I stretched the ribbon tight across the frame and attached that with more hot glue, lots of hot glue.  This is what the back looks like of a third one I made with a frame I already had. 
 Next I popped on the other piece of cardboard to cover up the mess I made and here is what I ended up with...
Tada!
a cute, hair accessory frame.  I love that it only cost me a dollar and some leftover supplies I already had! 
Linking to:


Apple Festival Craft Booth

I'm back!  I am done with the craft booth I did with my friend this past weekend. I did alright I think.  I definitely don't think these type of things are huge money makers (especially when it's held in a tiny town) but I did make enough to buy a serger (a cheap one) or maybe redecorate my living room I can't decide which I want more!  I won't be holding my breath though because when it comes down to it I will probably end up doing something boring responsible like putting it towards student loans or something.  My husband is getting his MBA right now so we are still living the student life.

I tried to remember to take pictures of everything, but it didn't happen so here are the few shots I did get!
All of the adorable platters you see were made by my friend Jenna.  That incredibly cute pleated tablecloth was made by my mother a few years ago.  I got those huge antique barn windows for F-R-E-E! What can I say, one man's trash is my treasure.  The window with the wreath on it is mine, it's going up in my living room.  I had to bring it with the wreath attached so people could get an idea of what you can do with them.  It was funny listening to all the wives trying to convince their husbands that it would be cool to have an older than dirt, beat up window hung up on their wall, many of the men did not agree, kind of like the silly guy that gave us all those windows in the first place because he said they were junk and he was taking them to the dump!
  

Here is the left side of the booth.  I didn't even take a picture of the other side, sorry I got distracted and never remembered to go back to finish taking pictures.  I made all that crazy stuff including all the pants which will soon be available to purchase.  More info on them later.
  
I can't even tell you how many hours I spent on this stuff.  The night before the Festival I stayed up all night and never went to bed in hopes that I would finish everything I started.  I still didn't!  I have several half finished pairs of pants and a thousand half finished flowers and headbands, so needless to say I am going to finish everything and open an Etsy shop so all that work doesn't go to waist! ;o)

One of my favorite parts of this whole thing had to be finding and fixing up things to display all my stuff in.
 
 I already had this beat up, wooden crate.  I gave it a quick coat of some aqua colored spray paint and then put some leftover glaze I had on top to play up all the cracks it had it in it.  I didn't take an official "after" picture but you can see it in one of the pictures below.
 I found these stocking hangers at the thrift store for 50 cents each.  I am not a big fan of pure gold but I loved the design. I gave it a coat of white spray paint with help from my "assistant".


I thought they looked a little boring, so I scuffed them up to let some of the metal peek through.


I turned the crate I painted upside down and added the stocking hangers on top and it made the perfect place to hang the headbands.  You can kind of see it in the first picture.


I also found this tray at the thrift store for 50 cents.  I first spray painted it black and let it dry which I don't have a picture of, then I rubbed a candle on the edges to get wax where I wanted the black to show through.


Then I spray painted it white on top and let it dry.

After it was dry I took a rough sponge and rubbed it all over the edges.  Everywhere I had put the candle wax the white paint rubbed off, but left the black paint untouched, unlike what using just sandpaper would've done.  I used the tray to hold hair clips which once again I didn't take a picture of!  I'm sure there will be more of them to see in the near future as soon as I get all my half finished ones done.

and do you remember these little compotes (is that what they're called?) in the back of that first picture?  They made the perfect spot to hold some jewelry and now I use the one on the right to store bracelets at home.

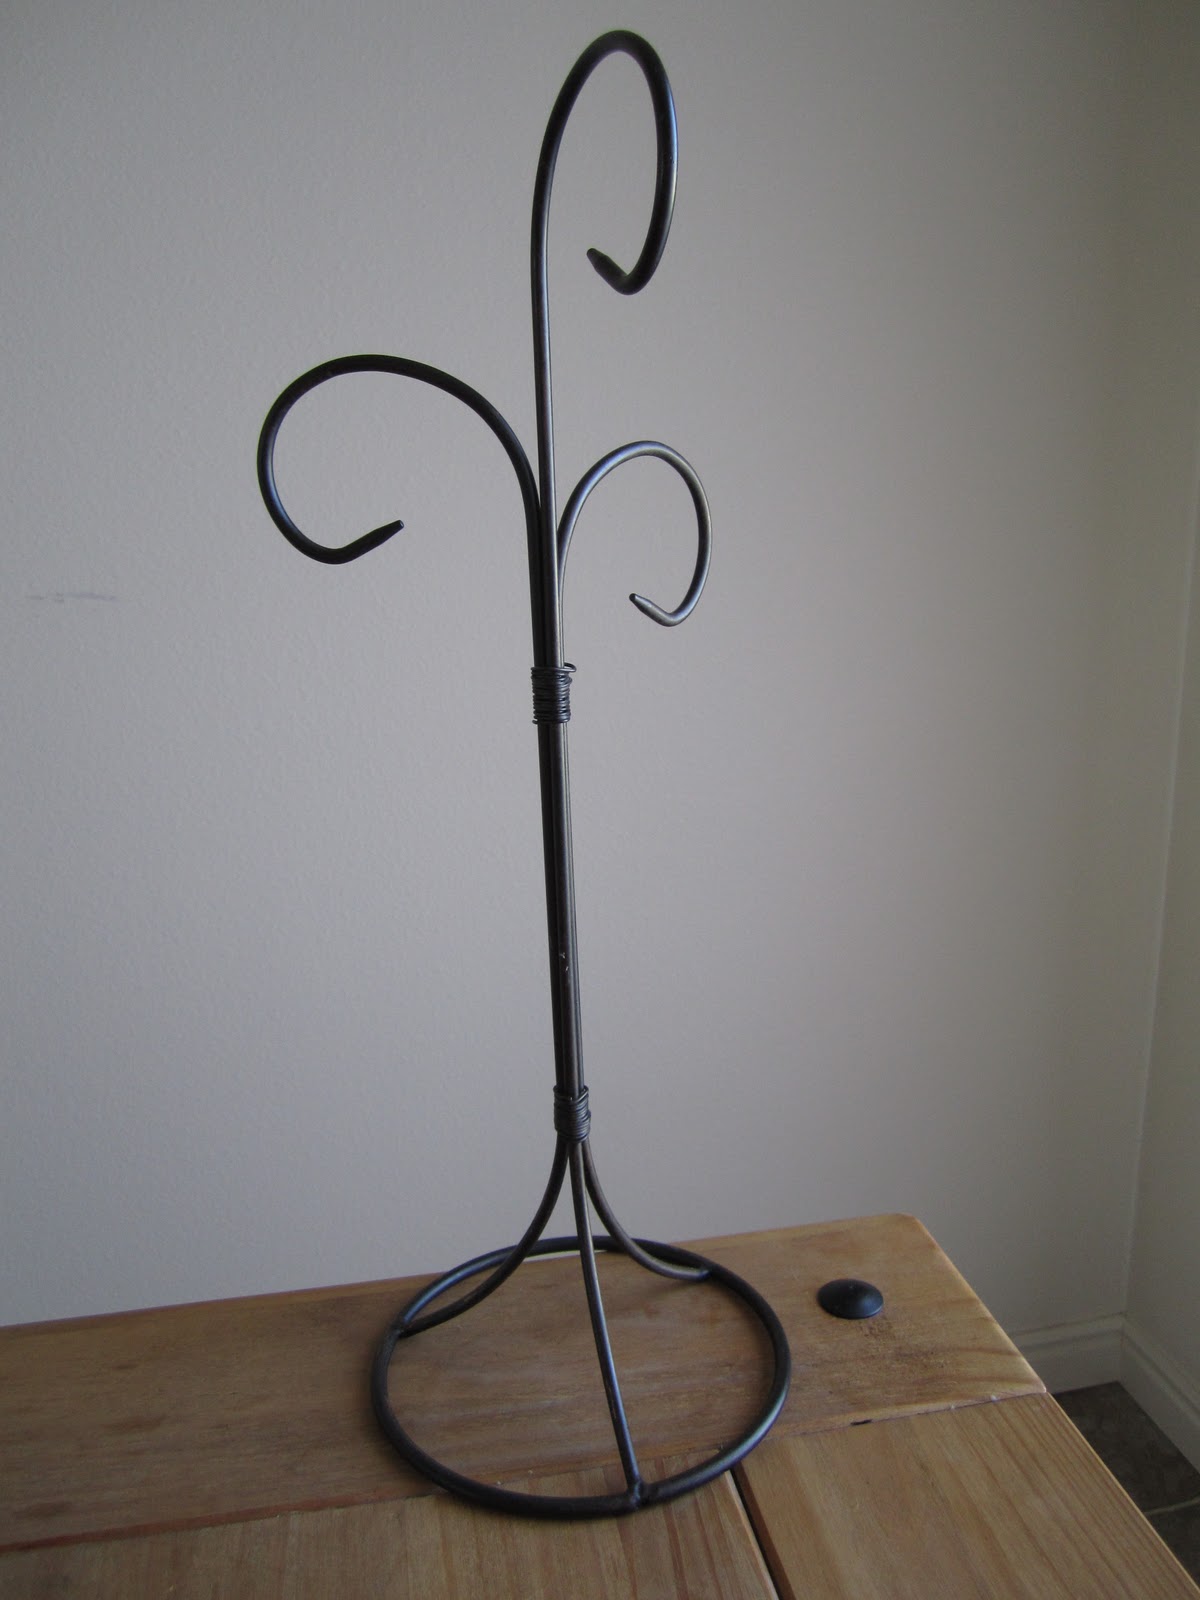
I also found this thing at the thrift store for 75 cents.  What is it anyways?  I don't have a clue.  Anyways It was perfect to hold more headbands!  I wish I had close up pictures so I could show you all the stuff I made.  I will just have to finish up all the half finished stuff I started making and then post pictures of that.
Monday, October 4, 2010

Crepes

Sorry I've been m.i.a. lately.  I am doing a craft booth this Saturday at the New Harmony Apple Festival.  If you live near Southern Utah you should come take a peek.  I have been very busy.  After Saturday I should have some time to show you all the good stuff I've been making!  For now I thought I would share a quick recipe for these yummy things...

We had general conference for our church this past weekend and it's our family tradition to have a nice big breakfast and "juice bar" while we watch the conference on tv.  Crepes seem to be one of our favorite breakfast recipes.

Crepes are super thin pancakes that can be served with just about any toppings you can think of whether sweet or savory.  Some people use these just as you would use a wrap.  We go for the sweet variety for breakfast at our house. Some of my favorite combinations are strawberries with whipped cream and Nutella with sliced bananas.  I hope you like them!

Crepes
 1 1/2 c. milk
1 c. flour
2 T. sugar
1/4 tsp. baking powder
1/4 tsp. salt
1/2 tsp. vanilla
2 eggs
1 T. oil or melted butter

  Mix everything together.  Lightly oil a nonstick frying pan and bring to medium heat.  Drop in batter (around 1/4 cup at a time) tilt and turn the pan in a circular motion allowing the batter to swirl around and coat the bottom of the pan evenly.  Cook over medium heat until the edges curl.  Turn once and cook for another 10-15 seconds until golden underneath.

When making savory crepes omit the vanilla and sugar and try adding your favorite herbs to the mixture.

The batter can be stored in the refrigerator for up to 48 hours or you can cook them all at once and store them in the fridge for several days.  Crepes also store well in the freezer just place them in a resealable plastic bag and they will keep for up to 2 months.  When using frozen crepes allow them to thaw a little before attempting to peel them apart. 
Related Posts with Thumbnails
 
Related Posts with Thumbnails